The following is a tutorial on how to use deploy.comfyui.asia (deployed by me) in conjunction with ComfyUI. The network architecture is as follows:
If you need complete privatization, please fork my project: https://github.com/leoleelxh/comfyui-deploy-figma, and complete the private deployment yourself. Contact me for technical support if needed.
Here, I would like to thank the original author BennyKok for this infrastructure-level application in the AI era, especially the ComfyUI era! 🙏
Sometimes, we need to use a local GPU or a GPU within the local network. Due to the limitations of the Figma plugin and to standardize the workflow, we need to make local ComfyUI publicly accessible. Rest assured, the following solution is safe.
This is the simplest, but requires some networking knowledge. Specifically, you need a domain name and configure port forwarding on your router. Since there are too many tutorials on the internet, I will not go into details here. Please refer to relevant tutorials. Generally, if the company has operations personnel, they will know how to do it.
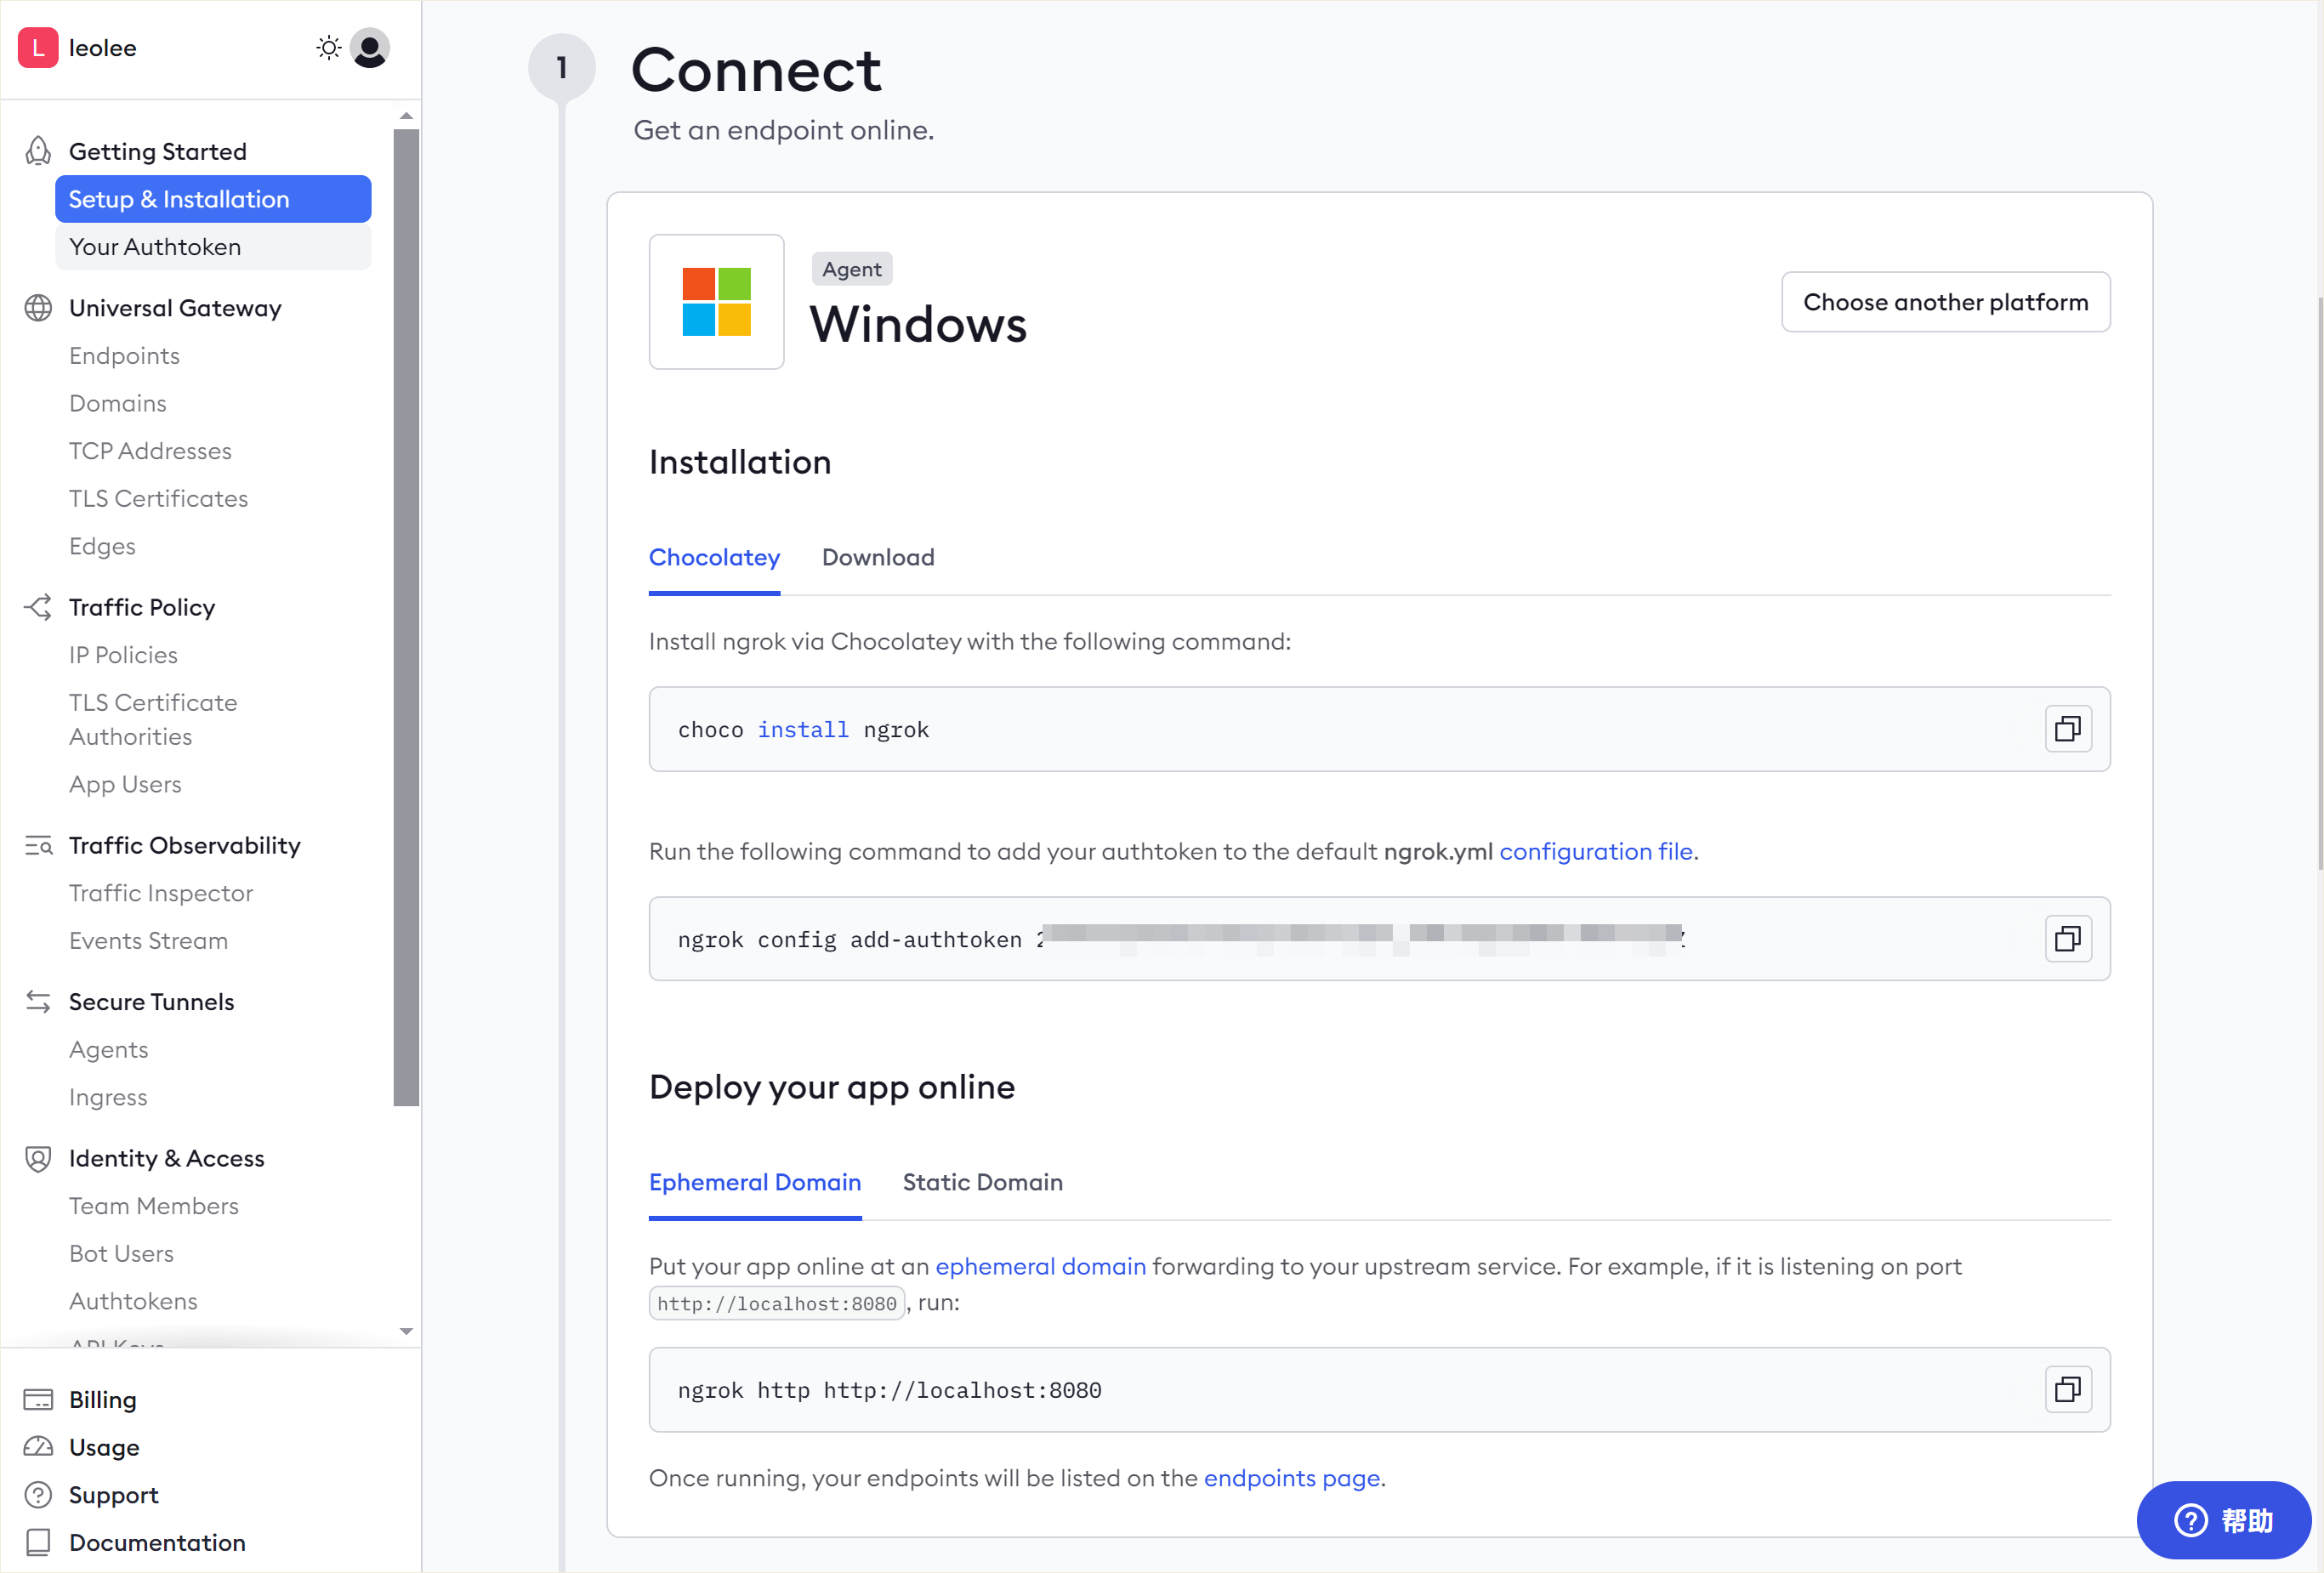
This solution is simple to set up, safe, and effective. I recommend everyone to use it.
Go to the official website: ngrok.com and complete the registration. After registration, the official website also provides very detailed tutorials. Just follow them.
In general, we need to storm http://localhost:8188, so ngrok's command is:
ngrok http <http://localhost:8188>